Understanding Your Dog’s Ears: Why Cleaning Matters
A dog’s ears are more complex than they appear and require regular attention to maintain their health. Understanding their basic anatomy is the first step in providing proper care. Unlike human ears, a dog’s ear canal is L-shaped, with a long vertical canal leading to a horizontal canal that ends at the eardrum Source: VCA Hospitals. This unique structure, especially in breeds with floppy ears, can trap moisture, debris, and parasites, creating an ideal environment for problems to develop.
Common issues affecting a dog’s ears include infections and mites. Ear infections, often caused by bacteria or yeast, are prevalent and can lead to significant discomfort, pain, and even hearing loss if left untreated Source: American Kennel Club. Symptoms typically include head shaking, scratching at the ears, redness, swelling, discharge, and an unpleasant odor Source: American Kennel Club. Another common problem is ear mites, tiny parasites that live in the ear canal, causing intense itching, dark, crumbly discharge resembling coffee grounds, and inflammation Source: PetMD.
The crucial role of regular ear cleaning in a dog’s overall health and well-being cannot be overstated. Routine cleaning helps remove wax, dirt, and debris that can accumulate and lead to blockages or infections Source: Preventive Vet. It also allows you to regularly inspect your dog’s ears for any early signs of issues like redness, odor, or discharge, enabling prompt veterinary intervention if necessary. Incorporating ear cleaning into your regular grooming routine is a proactive measure that contributes significantly to preventing painful conditions and ensuring your dog’s comfort. For comprehensive information on daily pet care, including various dog care tips, explore additional resources. Regular ear maintenance is an essential component of responsible pet ownership, safeguarding your dog’s auditory health and overall quality of life.
Essential Supplies for a Successful Ear Cleaning
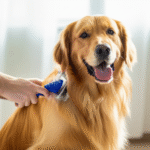
Before you begin the ear cleaning process, gathering the right tools is crucial for both effectiveness and your dog’s comfort. Having everything within reach will make the experience smoother and less stressful for your canine companion.
Here’s a list of essential supplies you’ll need:
* **Vet-Approved Ear Cleaning Solution:** This is the most important item. Do not use water, hydrogen peroxide, or alcohol, as these can cause irritation or damage to the delicate ear canal Source: AKC. Your veterinarian can recommend a specific solution that is safe and appropriate for your dog’s needs, especially if they have sensitive ears or recurrent issues Source: VCA Hospitals.
* **Cotton Balls or Gauze Pads:** These are ideal for wiping away debris and cleaning the outer ear and visible parts of the ear canal. Avoid using cotton swabs (Q-tips) as they can push debris deeper into the ear canal or even damage the eardrum Source: Texas A&M University.
* **Towels:** Keep a few old towels handy. One can be used to protect your clothes or furniture from any splashes, and another for drying your dog’s head if they shake off excess solution.
* **Treats:** Positive reinforcement is key! Have plenty of your dog’s favorite treats ready to reward calm behavior during and after the cleaning. This helps create a positive association with ear cleaning Source: ASPCA.
* **Gloves (Optional):** If your dog’s ears are particularly dirty or you want to avoid contact with the solution, disposable gloves can be helpful.
By preparing these supplies in advance, you’ll ensure a more efficient and stress-free ear cleaning session for both you and your dog.
Step-by-Step Guide: Cleaning Your Dog’s Ears Safely
Cleaning your dog’s ears can be a simple and routine task if approached correctly and patiently. Follow these steps for a safe and effective ear cleaning experience:
1. **Gather Your Supplies:** As mentioned, have your vet-approved ear cleaner, cotton balls/gauze, treats, and a towel ready and within reach. Choose a quiet, comfortable location where your dog feels secure.
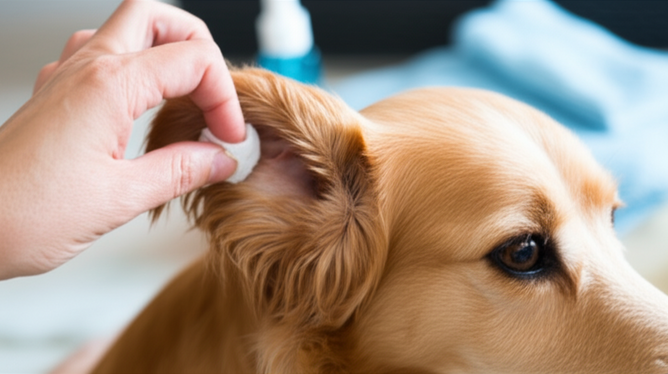
2. **Inspect the Ear:** Before applying any solution, gently lift your dog’s ear flap and visually inspect the ear canal. Look for any signs of redness, swelling, unusual discharge, or a foul odor. If you notice any of these symptoms, do not proceed with cleaning and contact your veterinarian instead Source: Preventive Vet.
3. **Administer the Cleaner:** Hold the ear flap gently but firmly upwards to straighten the ear canal. Place the tip of the ear cleaner bottle just inside the ear canal opening (do not insert it deeply) and squeeze a generous amount of the solution into the ear Source: VCA Hospitals. The ear canal should be filled.
4. **Massage the Base of the Ear:** Once the solution is in, gently massage the base of your dog’s ear for 20-30 seconds. You should hear a squishing sound, which indicates the cleaner is breaking up wax and debris within the canal Source: ASPCA. This massage helps distribute the solution and dislodge foreign material.
5. **Allow Your Dog to Shake:** After massaging, release the ear flap and allow your dog to shake their head. This natural action helps to bring the loosened debris and excess solution to the surface of the ear. It’s why having a towel handy is useful!
6. **Wipe the Outer Ear:** Use a cotton ball or gauze pad to gently wipe away any visible solution, dirt, wax, and debris from the outer ear flap and the entrance of the ear canal. Only clean as far as your finger can comfortably reach Source: AKC. Never insert cotton swabs or any other object into the ear canal, as this can push debris further in or damage the eardrum.
7. **Reward Your Dog:** Praise your dog profusely and offer treats throughout the process, especially once you’ve finished. This positive reinforcement makes ear cleaning a more tolerable, or even enjoyable, experience for them. If your dog has two ears to clean, repeat the process for the other ear.
Consistency and patience are key. If your dog is resistant, start with short sessions and gradually increase the duration as they become more comfortable.
Troubleshooting & When to Call the Vet
Maintaining your dog’s ear health is a crucial part of their overall well-being. While routine ear cleaning can often be managed at home, it’s common to encounter challenges. Knowing how to address these and when to seek professional veterinary help is key to preventing serious ear issues.
Common Ear Cleaning Challenges and Solutions
Even with the best intentions, you might face some hurdles when cleaning your dog’s ears.
* **Reluctance or Resistance:** Many dogs are not fond of having their ears handled.
* **Solution:** Start slow. Introduce the ear cleaning solution and cotton balls gradually, allowing your dog to sniff and investigate them. Reward calm behavior with treats and praise. Make it a positive experience by associating it with good things. Consider doing short, frequent sessions rather than one long, stressful one Source: AKC.
* **Difficulty with Technique:** Ensuring you’re cleaning effectively without causing harm can be tricky.
* **Solution:** Always use a vet-approved ear cleaning solution. Gently pull the ear flap up and outward to straighten the ear canal. Squirt the cleaner into the canal and massage the base of the ear for 20-30 seconds to help break up debris Source: ASPCA. Allow your dog to shake their head, then use a cotton ball or gauze to gently wipe away any visible discharge from the outer ear and ear flap. Never insert anything into the ear canal, such as cotton swabs, as this can push debris further in or damage the eardrum Source: Texas A&M University. For more general grooming tips, check out our guide on How to Groom Your Dog at Home.
* **Post-Cleaning Irritation:** Sometimes, after cleaning, your dog might still seem uncomfortable.
* **Solution:** Ensure the cleaning solution is appropriate and not causing irritation. If irritation persists or worsens, consult your veterinarian. Over-cleaning can also lead to irritation, so stick to the recommended frequency for your dog.
When to Call the Vet
While routine cleaning is preventative, certain signs indicate a more serious underlying issue that requires professional veterinary attention. Do not attempt to self-treat suspected ear infections or injuries, as this can worsen the condition or make diagnosis difficult Source: Banfield Pet Hospital.
Contact your veterinarian immediately if you observe any of the following warning signs:
* **Strong Odor:** A foul smell emanating from the ear Source: PetMD.
* **Excessive Scratching or Pawing at Ears:** Constant itching or discomfort.
* **Head Shaking or Tilting:** Frequent head shaking or holding the head tilted to one side.
* **Redness or Swelling:** Visible inflammation or swelling of the ear flap or inside the ear canal.
* **Discharge:** Any unusual discharge, especially if it’s yellow, green, black, or has a waxy appearance and a strong odor Source: VCA Hospitals.
* **Pain or Sensitivity:** Your dog yelps, flinches, or resists when their ear is touched.
* **Hair Loss or Scabs:** Around the ears due to scratching.
* **Loss of Balance or Disorientation:** In severe cases, ear infections can affect balance.
* **Changes in Behavior:** Lethargy, loss of appetite, or general irritability.
These symptoms could indicate various ear problems, including bacterial or yeast infections, ear mites, allergies, or even foreign objects in the ear canal Source: AKC. A veterinarian can accurately diagnose the issue and prescribe the appropriate treatment, which may include medicated ear drops, oral antibiotics, or other interventions. Early detection and treatment are crucial to prevent chronic ear problems and hearing loss.
Maintaining Ear Health: Prevention & Routine
Preventing ear problems in your dog is always preferable to treating them. Establishing a consistent routine of ear care and being proactive can significantly reduce the risk of infections, mites, and other uncomfortable conditions.
Regular Inspection and Cleaning Frequency
One of the simplest yet most effective preventive measures is to regularly inspect your dog’s ears. Make it a habit to check their ears a few times a week for any signs of redness, swelling, discharge, or odor. Early detection of minor issues can prevent them from escalating into serious problems Source: Preventive Vet.
The frequency of ear cleaning depends on your dog’s breed, activity level, and individual ear health. Dogs with floppy ears (like Basset Hounds or Cocker Spaniels), those that swim frequently, or dogs prone to allergies may require more frequent cleaning – sometimes weekly Source: AKC. For dogs with upright ears and no history of issues, cleaning once a month or even every few months might suffice. Always consult your veterinarian to determine the ideal cleaning schedule for your specific dog Source: VCA Hospitals.
Drying Ears After Exposure to Moisture
Moisture trapped in the ear canal creates a warm, damp environment that is perfect for yeast and bacteria to thrive, leading to infections. After swimming, baths, or even rainy walks, it’s essential to thoroughly dry your dog’s ears. Use a soft towel or a cotton ball to gently wipe the outer ear and the visible parts of the ear canal. For dogs with thick ear hair, a very low-setting hairdryer (held at a safe distance and never pointed directly into the ear canal) can also be used, or gently pluck excess hair from the ear canal if advised by your vet or groomer Source: PetMD.
Diet, Allergies, and Overall Health
Sometimes, chronic ear issues are not just about hygiene but are linked to underlying health problems, most commonly allergies. Food allergies or environmental allergies can manifest as recurrent ear infections, along with skin issues. If your dog experiences persistent ear problems despite regular cleaning, discuss potential allergies with your veterinarian. They may recommend dietary changes or allergy testing Source: Banfield Pet Hospital. A balanced diet supporting overall immune health also plays a role in your dog’s ability to ward off infections.
Regular Veterinary Check-ups
Routine veterinary check-ups are invaluable for ear health. Your vet can perform a thorough examination of the ear canal using an otoscope, identifying issues that might not be visible to the naked eye. They can also provide professional cleaning if necessary, particularly for stubborn wax buildup or if your dog is uncooperative at home. Early intervention by a professional can prevent minor irritations from becoming painful, chronic conditions, ensuring your dog’s ears remain healthy and comfortable.
Sources
- American Kennel Club – Dog Ear Infection: Symptoms, Causes, and Treatments
- American Kennel Club – Dog Ear Infections: Symptoms, Causes, & Treatments
- American Kennel Club – How to Clean Dog’s Ears Safely
- ASPCA – Ear Care
- Banfield Pet Hospital – Common Conditions: Ear Infections
- PetMD – How to Keep Your Dog’s Ears Clean and Healthy
- PetMD – Ear Infections in Dogs
- PetMD – Ear Mites in Dogs: Causes, Symptoms, & Treatments
- Preventive Vet – How To Clean Your Dog’s Ears
- Texas A&M University – Pet Talk: The Ins and Outs of Ear Cleaning
- VCA Hospitals – Ear Canal Anatomy and Function in Dogs
- VCA Hospitals – Ear Cleaning in Dogs
- VCA Hospitals – Ear Infections in Dogs